Ducker
What Ducker is and how to get the most out of it.
Product Version: 1.6 · Last Updated: 11th December 2025
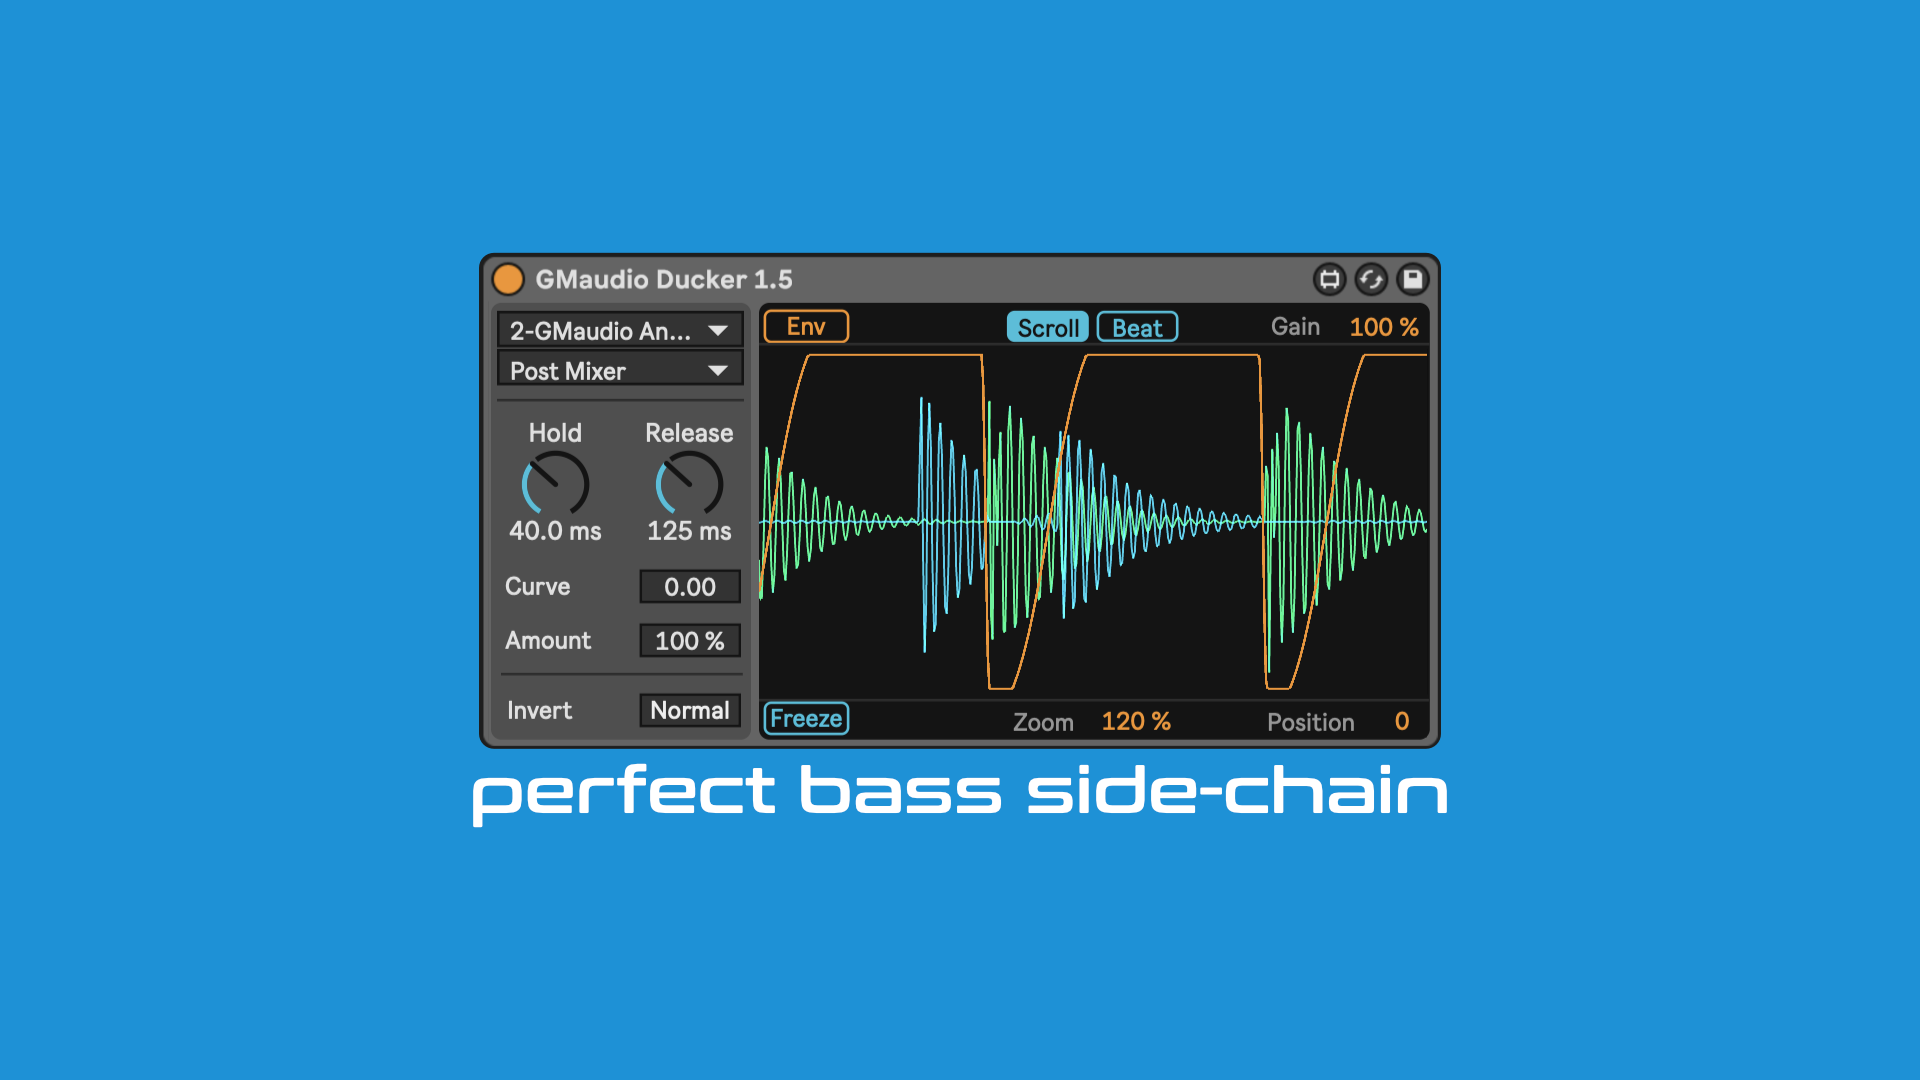
Concept
It seems that every 6–12 months there is a new “Sidechain” technique, yet countless artists continue to publicly praise Ducker. Why? Because very few solutions address the problem as carefully and deliberately as Ducker.
“Ring Mod Sidechain” originally threw clarity out the window so that every available bit of headroom could be used up by either kick or bass. One oversight with this method is that, in order for definition to occur, we need the edges to be defined. That means, there should be some breathing room between each sound. Relying purely on pitch and harmonics to differentiate between kick and bass is selling yourself short and does not work for all genres.
Newer iterations have reduced distortion a lot, but they are still not ideal for every use case and can be finicky to get right. Another significant conflict is that your kick needs to be an ideal length for it to work well (which often is not the case with many of my clients’ music). If your kick is too long, there is no way to make the ducking envelope shorter so your bass can start earlier. Also, because it is still closely linked to amplitude modulation, there is still risk of new tones being introduced based on both sounds, shifting the focus away from tight, clean bass. For experienced producers, this method can work, but it is by no means foolproof or suitable in all situations.
“Spectral ducking” uses FFT processing to split the signal into a series of sine waves, sometimes thousands, so that almost individual frequencies can be ducked. But this separation is often not musically related and has very little connection to how we actually perceive sound (we hear approximately 40 musically related bands). It has the benefit of being linear-phase, but that does not matter much if it makes your signal sound like a warbling mess.
I am not a great ambassador for spectral processing in mixing. For sound design it can be a fantastic tool, but clarity is not its strong suit without significant caveats such as latency and CPU. This approach to ducking can work, as any degradation in sound quality is often masked while the Sidechain signal takes precedence, but many implementations still fall short. Neither of these approaches allow you to use an inaudible “trigger” type signal (like people used to do with compressors) without making it inaccurate and more difficult to use.
Using MIDI to trigger a volume envelope has some benefits, like the ability to scale the envelope based on velocity. It is probably the closest thing to Ducker, but MIDI can be off by as much as a few samples and might jump around a sample or two. This is due to MIDI not operating in the audio domain and therefore requiring conversion, which introduces variables and results in a kind of jitter.
Ducker still stands because it is easy to use, it is sample accurate, it avoids additional artifacts, and it is flexible. This latest version of Ducker features many quality-of-life improvements so that it will “just work” for years to come, building on the previous version released 3 years ago.
Every aspect has been revisited and refined, with the addition of one new feature: Phase Offset. This allows sample-accurate timing adjustment of the bass signal so you can further minimise destructive interference, or simply fine-tune the groove, while keeping the ducking envelope accurate. One feature was left out and that is a multiband split, which instead opted to create as a separate, free device, so anyone can experiment with multiband processing.
I am consistently trying new tools, listening to user requests, researching new methods, running controlled experiments and developing new algorithms. For example, I developed an auto-alignment algorithm that detected destructive interference between two signals and suggested phase and polarity adjustments in order to minimise it. After using it inside Ducker, I found it had minimal real-world value for its complexity. That kind of testing is exactly why Ducker is focused on what actually works in practice, not just what is technically possible.
This is not where Ducker’s journey ends. New variations of all of the above methods are being explored for Ducker Version 2.0. Please keep sending me feedback, feature requests, test scenarios and use cases, and I will continue to deliver a product that reliably gets you results.
If you would like to learn more about Ducker, check out this playlist on YouTube
Happy Music Making!
How to use it
Ducker is best utilised on instruments that compete for the same frequency range, eg; Kick and Bass. For the purposes of this User Manual & Live’s Info View Text, we call the Kick the ‘Sidechain signal’ and the Bass the ‘Affected signal’. This suggests that Ducker can be used for more than just Kick and Bass and is simply an accurate and distortion free way of controlling the amplitude of one signal based on the amplitude of another. Still, Ducker is designed with Kick & Bass in mind and will yield the best results on these instruments.
Ducker should typically be the last device in your device chain and placed on the Track that you want to control the amplitude of (Affected signal).
Latency
Ducker adds 512 samples of ‘lookahead’ for the Attack segment of the Envelope to take place. The attack segment of the envelope is fixed and designed to avoid any distortions.
Controls
Audio Controls
Ext. Channel Input selects the channel or signal path used as the Sidechain input for transient detection.
Ext. Track Input selects the Track in Live to be used as the Sidechain input for transient detection.
Hold Time adjusts how much of the Release Time (as a percentage) is used to mute the Affected signal before fading the sound back in.
Release Time adjusts how long it takes for the level to rise back to full volume after a transient is detected, letting the Affected signal fade in faster or slower. Hold Time is always a percentage of this Release Time. Use Interval Snap to quantize Release Time to a rhythmic interval.
Interval Snap snaps the Release Time to the nearest rhythmic interval based on the project tempo when clicked.
Envelope Curve provides shape adjustment of the rising amplitude, from logarithmic to exponential, allowing for fine adjustment of how the Affected signal fades back in.
Duck Amount adjusts how much the Affected signal is muted when a transient is detected.
Phase Offset shifts the Affected signal earlier or later in time (measured in samples) to reduce phase cancellation (destructive interference) or subtly change the groove. Unlike Live’s Track Delay, this keeps Ducker’s envelope aligned with the Sidechain input.
Polarity flips the polarity of the Affected signal (inverts the waveform). This can reduce destructive interference when overlapping sounds move in opposing directions. Use together with Abs Envelope Mode to check for cancellations.
Scope Controls
Envelope Mode selects what the Scope displays as the Envelope signal;
Env: Displays the gain-reduction envelope applied to the Affected signal.
Abs: Displays the absolute envelope of the Sidechain (Kick) and Affected (Bass) signals combined, helping you spot cancellations. Try inverting Polarity or adjusting Phase Offset if the combined envelope dips below either signal.
Scope Gain adjusts the amplitude of the signals shown in the Scope. This does not affect the audio.
Scope Mode chooses how the Scope updates: continuously (Scroll), or locked to the project tempo and Sync Interval (Sync).
Sync Interval sets how often the Scope refreshes when in Sync mode: every beat (1/4n), two beats (1/2n), a bar, or two bars.
Freeze Scope freezes the Scope display so you can zoom and pan around the captured waveform (using Position) without it updating.
Scope Zoom controls how much of the waveform is visible in the Scope, from single transients to longer phrases.
Scope Position moves the Scope’s focus through the captured history, from older content (-100) to the most recent (100).
Scope Options opens additional display options for the Scope, including Colour Shifts and Line Width.
Scope Options
Envelope Hue shifts the colour of the Envelope signal displayed in the Scope by adjusting its Hue.
Kick Hue shifts the colour of the Kick (Sidechain) signal displayed in the Scope by adjusting its Hue.
Bass Hue shifts the colour of the Bass (Affected) signal displayed in the Scope by adjusting its Hue.
Line Width sets the thickness (in pixels) of the Scope lines.
Tips
For ideal Kick and Bass interaction, the settings you choose will depend on the Kick you use. In Version 1.6, the Release Time sets the total length of the Ducker’s Envelope, and should be adjusted first, based on the length of your Kick and Tempo of your track.
You can click the Interval Snap button to move the Release Time value to the nearest rhythmic interval based on your project’s Tempo. Depending on the genre and style of Kick and Bass, it can be useful to have a Kick length and Release Time close to a 16th note interval.
Then you can use the Hold Time and Envelope Curve to adjust for the contours of your Kick and how you want the Bass to fade back in. If the Kick is heavily processed then a longer Hold Time may be necessary. Sometimes a slower Release Time, like an 8th note, with some Envelope Curve can help emphasize certain rhythmic changes.
To check for destructive interference (or cancellations), use the scope in Absolute Envelope Mode to see the combined envelope of Kick and Bass. If the Absolute Envelope drops below either the Kick or Bass signals then destructive interference has occurred. With good monitoring, you can often hear these occurrences but this mode helps confirm or deny your suspicions.
You can either invert the Polarity, or adjust the Phase Offset, to turn the destructive interference into constructive interference. Not every case needs to be mitigated and sometimes simply adjusting the Release Time and Envelope Curve is a perfectly appropriate way to mitigate the issue.
Also, you may find that some adjustment of Phase Offset can help make the Bass “feel” punchier, not necessarily because of destructive interference, but simply because it helps emphasize the groove of the music.
GMaudio Ducker was designed to make the process as simple and effective as possible, this includes adjusting settings, therefore it does not require presets. All controls have Info View Text and can be viewed anytime within Live (using the shortcut: ?). The default settings provide an excellent starting point that usually requires minimal adjustment.