Squeeze
What Squeeze is and how to get the most out of it.
Product Version: 2.1.0 · Last Updated: 28th August 2026
Concept
The spark that brought Squeeze into existence came about by accident when I was trying to develop an accurate peak limiter. I essentially created my own implementation of a ‘Doom Compressor’, then took inspiration from OTT and made it multiband using parallel-safe crossovers. You can read more about how the algorithm was initially developed here.
Squeeze has been improved many times since then and has nearly 10k users, many of whom report using it in every project. My description, ‘Imagine OTT without the downward compression, mixed with a doom compressor, but pushed to the extreme with zero phase shift’, still largely stands, but the algorithm has become much more sophisticated and I’d like to think that there is no substitute for Squeeze.
At its heart, it’s still an upward compressor/limiter, but numerous mechanisms exist to ensure that its brute-force origins are retained while maximising punch and clarity. It’s completely at home in sound design sessions as well as careful mixing situations. The default can work great on groups to help correct tonal imbalances and increase sonic density, or it can be pushed to its limits to extract unheard sonic details from existing sounds. It makes achieving desired loudness levels an absolute breeze and is very light on CPU. All of which, is accomplished by design.
The range of effects that Squeeze can produce is incredibly vast, even with its few parameters. I hope you enjoy exploring this device, and squeezing every last drop from your sounds. Happy music making!
How to use it
Squeeze can be used on individual sounds, groups, or a full mix. The default settings will gently balance the low, mid and high frequencies of a signal, enhance transients, and improve loudness.
The device looks at the incoming signal’s peak level, and if it’s above the Floor, pushes it closer to the Ceiling. Therefore, a practical way to use it in a mixing context to increase loudness and density, is to set the Floor approximately to the RMS level and the Ceiling to the Peak level. You could use Live’s Track Meters to get an idea of where to set these values, then you can adjust the Style for the amount of spectral re-balancing, Squeeze for the strength of the effect, and adjust Mix to taste.
For sound design contexts, higher Squeeze and Mix values with lower Time values, will extract details from existing sounds. This can be used to bring up reverb and delay tails or normalize foley and field recordings into a full spectrum, heavily compressed texture.
Lowering the Ceiling and adjusting the Mix is a practical way to tame the processing when necessary.
Automating any or all of these controls is a great way to manipulate the intensity of a sound, or group of sounds, over the course of an arrangement.
Checking for the Latest Version
To check the version of a particular instance of Squeeze and whether an update is available, simply hover your cursor over the Display in Live. For more information, see Version Checker.
Controls
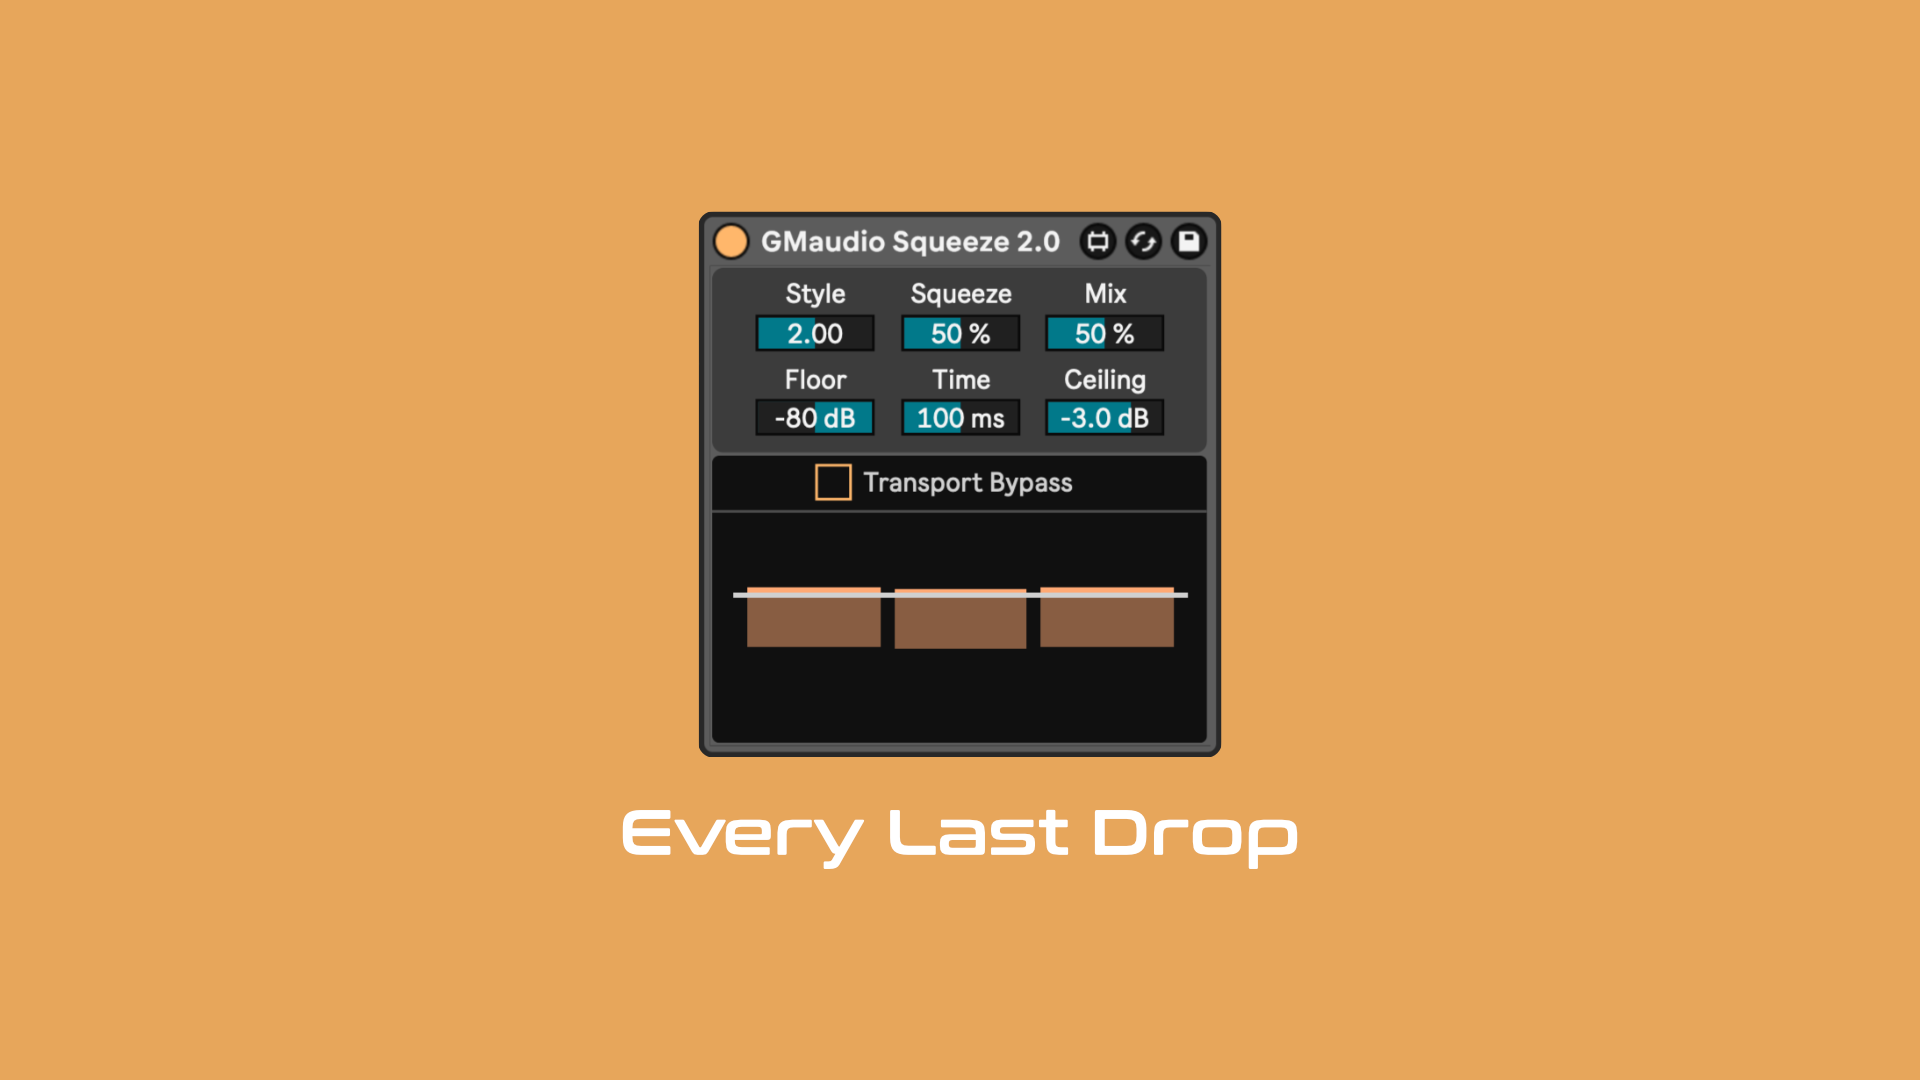
Display visualises the parameter values as coloured bars, with a line that approximates how the level is being increased. Click and drag here to increase or decrease Squeeze.
Squeeze adjusts the strength of the effect, similar to a ratio control on a typical compressor.
Time adjusts the release for all envelopes. High values result in something closer to normalization; low values result in extreme upward compression, squeezing every last drop from your sounds.
Floor adjusts the level at which the effect takes place. Above this level, the signal is pushed closer to the Ceiling. Below this level, it passes through a transition region called the Knee, before the effect is bypassed.
Ceiling sets the level that the signal will be normalized to. Lower values, combined with Mix, tame the processing and make it more useful in a mixing context.
Mix adjusts the balance between the processed and unprocessed signal.
Style morphs between single-band and multiband operation. Multiband operation has been tuned to provide a flat frequency response with slight mid-band attenuation and bass boost, inspired by the original OTT.
Transport Bypass bypasses Squeeze when Live’s transport is stopped. This avoids noise from hardware, or reverb/delay tails, being brought up to full volume when nothing is playing.
Key Modifier Behaviours
Hold Alt/Opt (PC/Mac) to access the Knee control in Live.
Knee adjusts how quickly the effect fades out below the Floor.
FS Squeeze is fully accessible via Push and compatible with Push 3 Standalone.
Latency
FS Squeeze adds 8 samples of latency (less than 0.2ms).
Tips
The default settings are not only great for groups, but can also work well on the Master.
You can find a range of tips in this article Squeeze every last drop with GMaudio.
You can use Squeeze as an alternative to typical compression and limiting, bringing up reverb and delay tails, glueing sounds together, or even as a kind of sidechain by having one sound much louder than another. I’ll have a video exploring all of these and more on my YouTube channel soon.
If you find an interesting way to use FS Squeeze, let me know, or make a video for social media with the tags #fixationstudios #fsSqueeze #gmaudio and I’ll find you and give you some freebies if I like the content :D