Ableton's Roar Versus Multiband Saturator
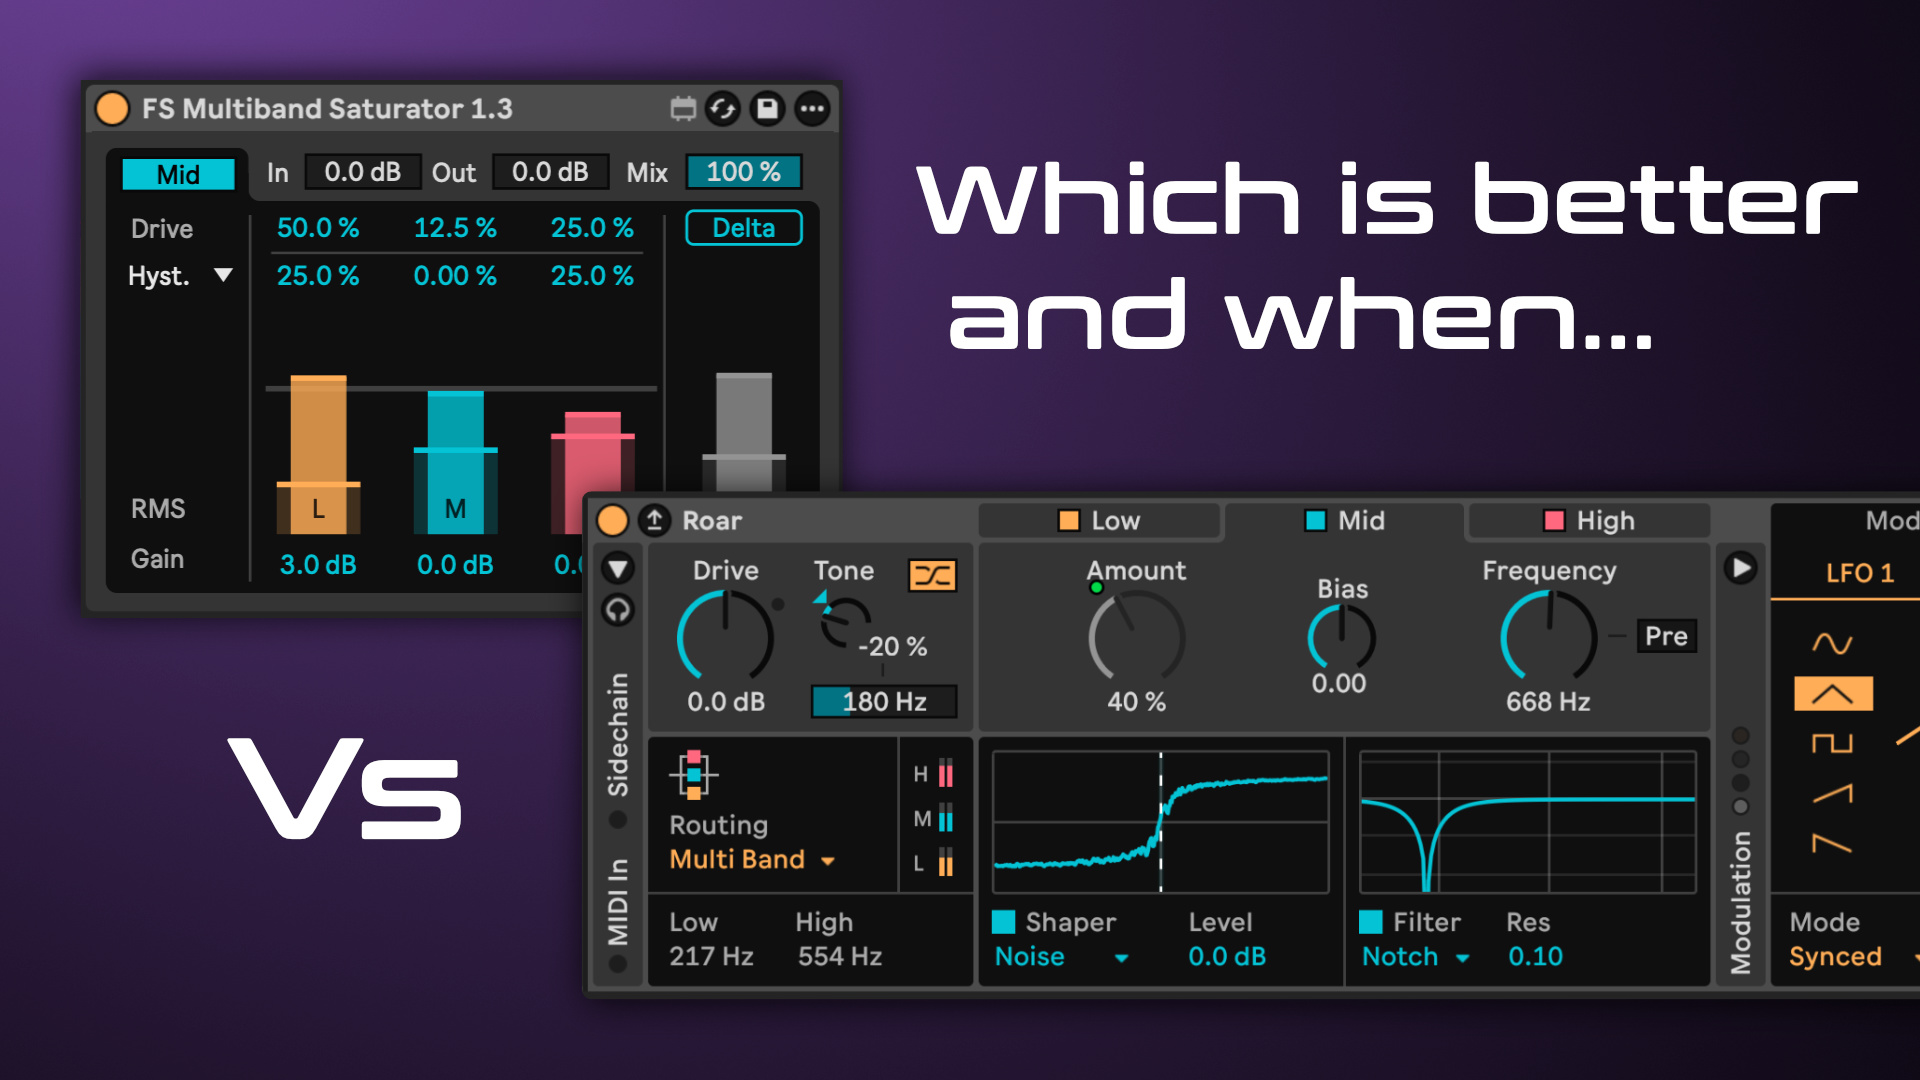
A question I’m often asked is “Why would I choose Multiband Saturator over Ableton’s Roar?”
Roar is great for experimental sound design, allowing you to achieve unique timbres from simple inputs, with a focus on exploring wild and modulated textures. This is what the developer intended. Here’s a link to an article interviewing them: Roar: Meet Live 12’s New Processing Powerhouse.
Multiband Saturator is different. It’s designed for mixing and mastering, with precise control over harmonics and how they are applied, while maintaining or adjusting frequency balance, loudness and width, with helpful metering and a fast workflow.
In this article I’ll highlight this fundamental difference in design, but first, check out this detailed comparison table I put together that also includes FabFilter Saturn 2. 👇
Roar vs Multiband Saturator vs Saturn 2
Last updated:
| Attribute | AbletonRoar | Fixation StudiosMultiband Saturator | FabFilterSaturn 2 |
|---|---|---|---|
| Primary role | Creative saturation/distortion inside Live. Strong for overt colour, feedback, modulation, and experimental distortion. | Precision multiband tool for adding harmonics exactly where they're needed, quickly, while preserving spectral balance, loudness, and stereo image. | Premium multiband saturation/distortion plugin with exceptional flexibility in crossovers, distortion models, modulation and feedback. |
| Crossovers |
|
|
|
| Parallel safety | Parallel processing produces notches at crossover frequencies due to phase rotation. | Designed to be used in parallel, anywhere in your project, without crossover artefacts. | Only safe to run in parallel if using 6 dB/oct slope for all crossovers, or Linear Phase mode. |
| Transparency |
|
|
|
| Metering |
|
|
|
| Loudness compensation |
|
|
|
| Mid/side workflow |
|
|
|
| Harmonic control |
|
|
|
| Tone shaping | Tone Shaping is applied at the Input and Output, not per band/waveshaper. | A single, continuous parameter, controls pre/post frequency biasing using a tilt filter, centred in the middle of each band. | Each shaper/model has its own tone internally applied, and can be further shaped with a 4 band Graphic-EQ. |
| Dynamic saturation | Using the Envelope Follower modulating Amount, with appropriate settings for Threshold, Filter Frequency/Width based on your incoming signal, you can get transient-like behaviour, with Attack & Release providing further adjustment. | A single, continuous parameter, controls a transient detection algorithm that modulates the effect (not the Drive), allowing you to focus the saturation on the Transient or Non-transient parts of the signal, per band. | Envelope Follower has a Transient Detection mode which can be based on the incoming signal or an external sidechain. This can then be used to modulate parameters like Mix or Drive. |
| Modulation / LFOs | Roar includes 2 LFOs, an Envelope Follower, Noise/Random and a modulation matrix. | All parameters can be modulated in Live using native LFOs, but modulation was not a focus of the design. | Fantastic modulation system including LFOs, envelope generators/followers, MIDI input, XY controllers/sliders, all mapped using a drag-and-drop system. You can program full ADSR envelopes and have them triggered by Audio or MIDI. |
| Speed for mix decisions | Not designed to carefully apply saturation. It was designed to explore unique timbres and exaggerated effects. | Strong visual aids, fewer controls, automatic loudness compensation and keyboard shortcuts all lead to a design that favours quick decision making, so you can focus on what matters most: the music. | Due to the complexity and number of options, you will likely have to save presets for specific situations to make the most of your time when mixing, while utilising external metering. |
| Main weakness | Poor anti-aliasing, can't be used in parallel, clunky gain staging. | Not as strong as other options for drastically changing the timbre of a sound or extreme sound design. | Heavy on CPU for little anti-aliasing benefit. Little to no metering. Can take a while to learn, explore and set up. |
| Anti-aliasing |
|
|
|
| CPU usage | Score: 7.3/10 (27% CPU). | Score: 6.9/10 (31% CPU). | Score: 4.6/10 (54% CPU). |
| Latency | 7 samples (High Quality). | 13 samples. | 3156 samples (Linear Phase). |
| Price | Free, if you have Live 11 or 12 Suite. | $22, requires Max For Live. | $149, VST/AU/CLAP plugin. |
As you can see, Multiband Saturator is in a category of its own, and that’s no accident! I’ll have a video highlighting some of these fundamental differences on my YouTube channel soon, but here’s a little more insight.
Parallel Processing
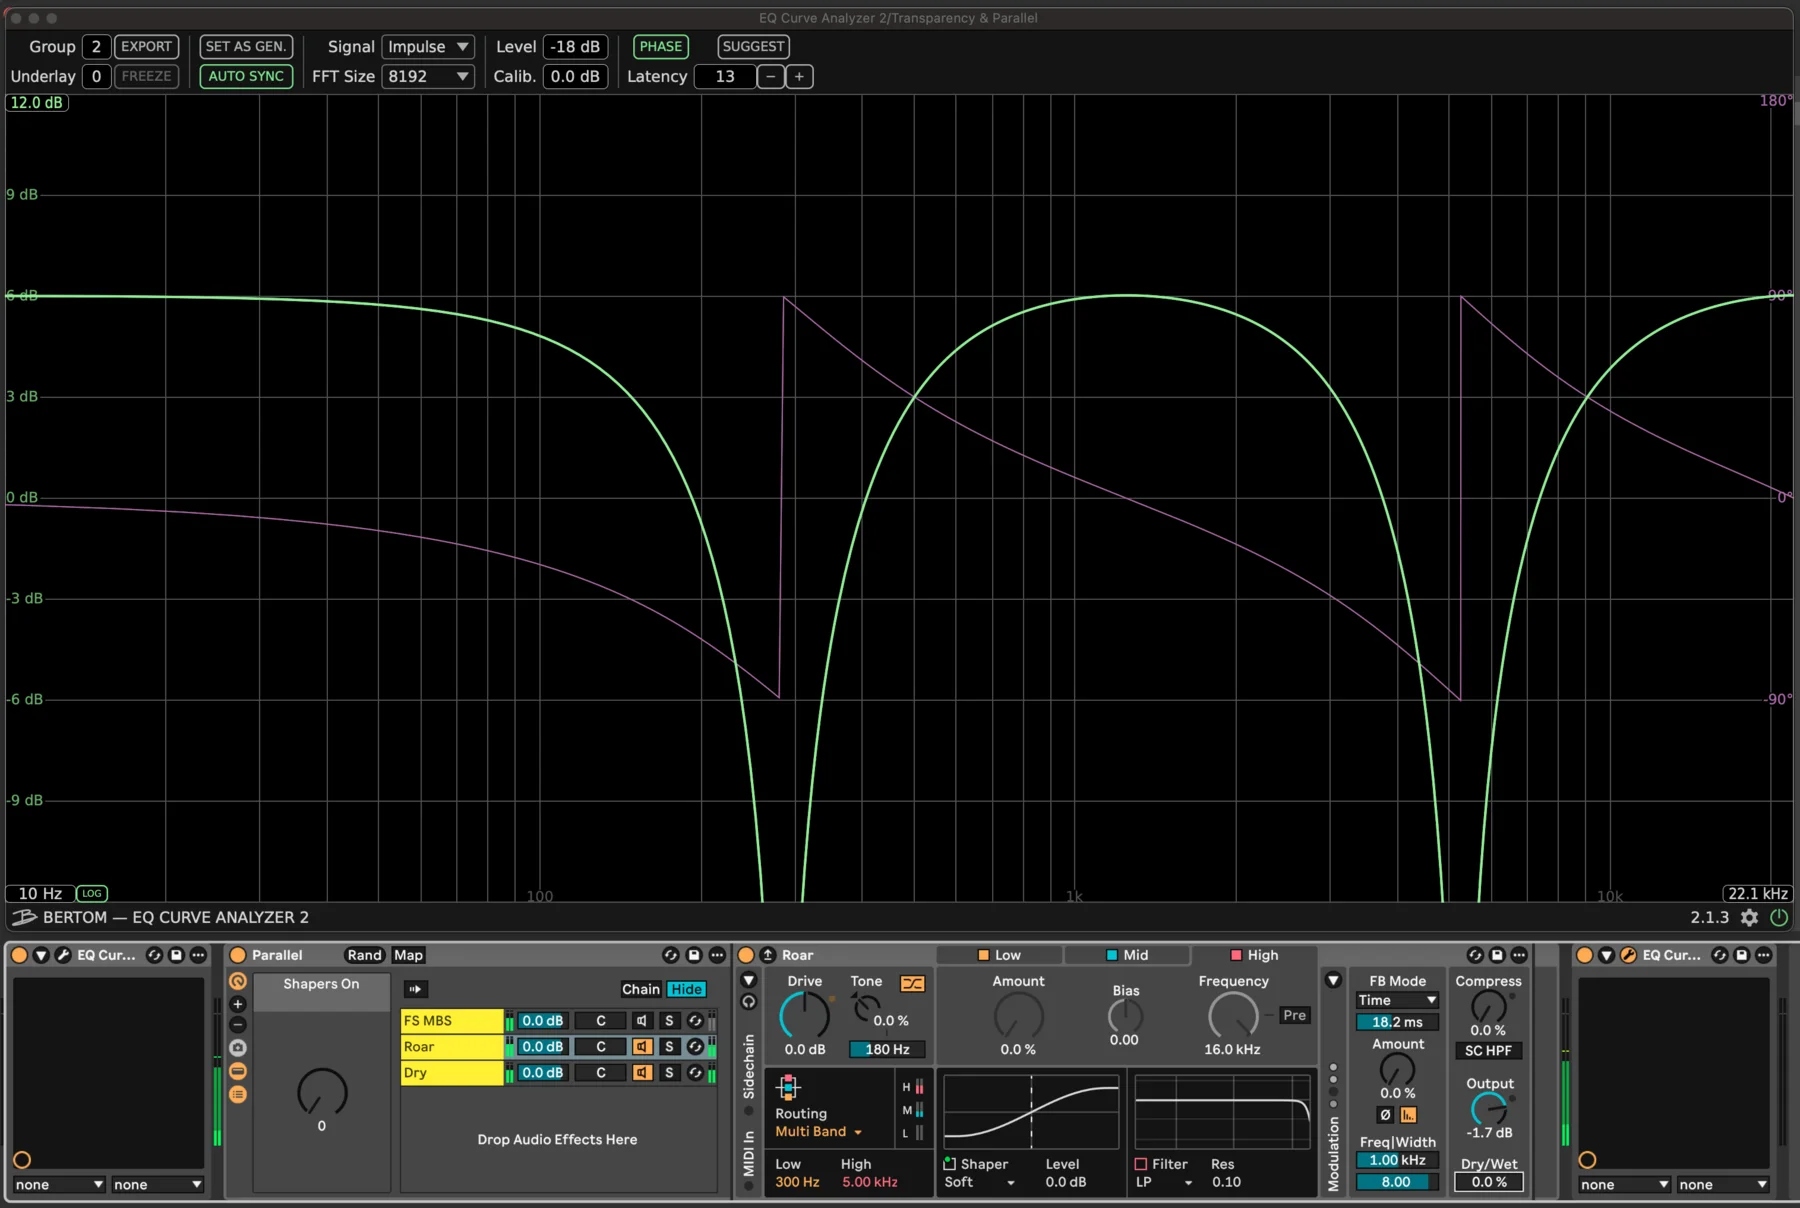
A common mixing technique is to use processing in parallel, allowing you to blend in layers of just the right amount of processing, without each effect making a permanent stamp on your sounds. In Live, we often do this using audio effect racks or return tracks.
If we have a rack with Roar set up in a similar fashion to Multiband Saturator, with a ‘dry’ chain in parallel, we get notches at the crossover frequencies due to the phase shift caused by the crossovers, along with some extra cancellations near Nyquist from the minimum-phase oversampling. Even with all of the waveshapers turned off and the effect set to Dry, we still see these notches. This is because Roar applies phase compensation to the dry signal to allow you to blend between Dry & Wet.
With Multiband Saturator, we can see that there is no phase shift at the crossover frequencies or near Nyquist. This is because the crossovers and oversampling were designed this way, and the Mix parameter is a simple crossfade between the input and output.
This means Roar wont work for these kinds of parallel processing techniques, whereas Multiband Saturator is safe to use in parallel anywhere in your project, in any way you like.
Loudness Matching
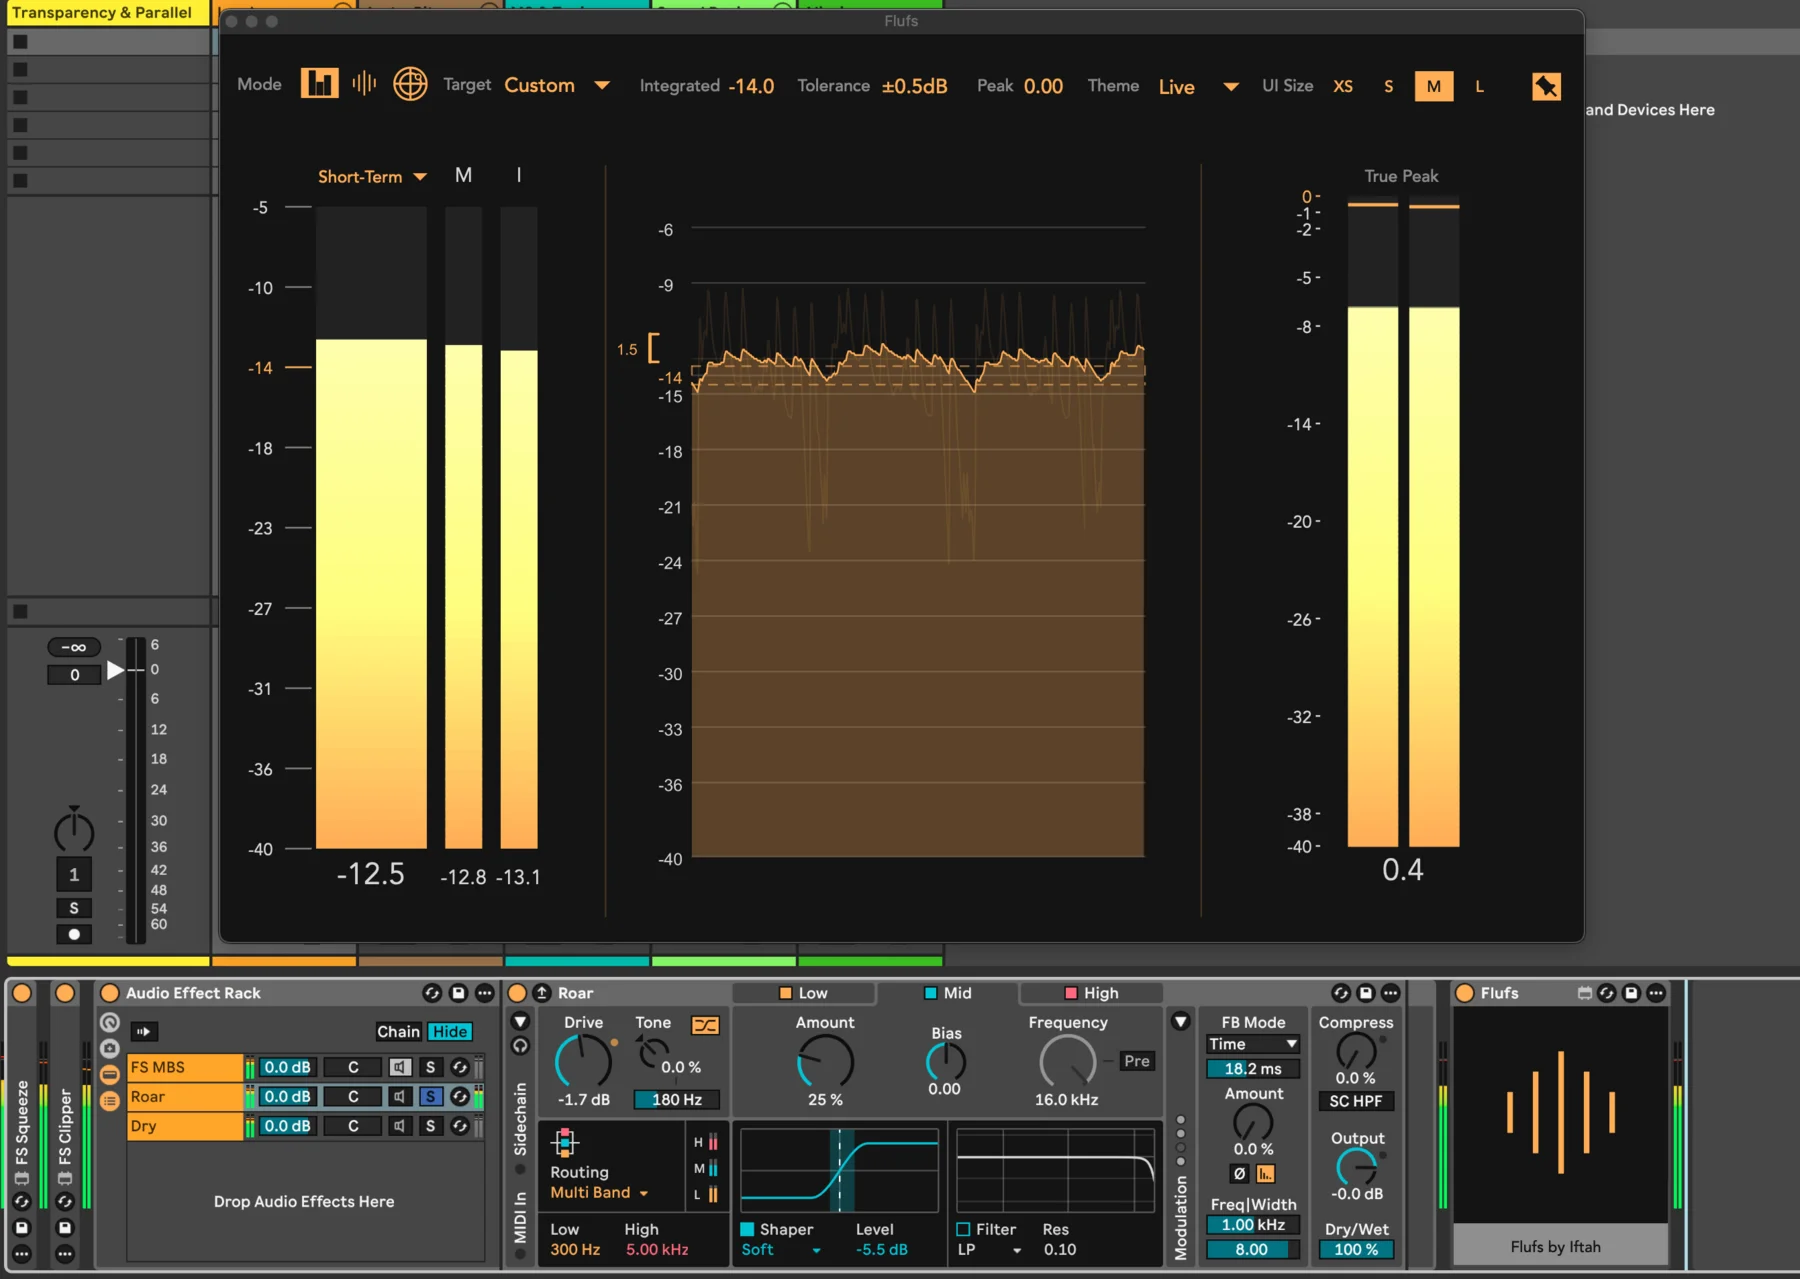
In order to judge whether the applied processing is actually improving a signal, we need to be able to level match the input and output so that when we bypass the effect, we have an objective comparison. It’s no secret that louder often sounds better. A simple 1 dB volume increase can provide instant gratification, so we need to avoid this and judge the change, not an increase in loudness.
Every shaper in Roar has a different output gain at 0% effect. This already makes it tricky to level match, especially between bands using different shapers. But if we just look at the Soft Shaper for all bands, which is closest to Multiband Saturator without any of the ‘Colour Controls’ applied, we see a 1.7 dB increase at the output. I can compensate for this in three different ways, each having a different effect on the result. Drive, Shaper Level and Output Gain will all interact with processing differently depending on how you’re using Roar.
Let’s put that aside for a moment and look at applying saturation to just a specific band. Sometimes we want to apply a little saturation to the mids to make something feel more musical, warm and full.
If we try to do this in Roar, we have to change two parameters, Amount and Shaper Level, and then jump between these and the Bypass button to compare the effect as we make adjustments. During my research, I realised that changing Amount from 0 to 100% produces a 30 dB increase in gain. If you increase Amount by 50%, a sufficient loudness match for Shaper Level will often be around -12 dB. This will differ with different signals and shapers, but it’s a practical way to approach loudness matching with Roar. So with Amount set to 25%, a Shaper Level of -6 dB should be close to level matched.
If we attempt this using Multiband Saturator, we only have to adjust one parameter. Drive automatically compensates the loudness, as closely as practical, for each waveshaper. This makes it much faster to add harmonics wherever they’re needed, without constantly adjusting different parameters.
Metering
Metering shouldn’t be there just to look pretty. It should help us confirm what we hear so we can make better decisions, faster. Roar’s metering shows activity using peak level to help us troubleshoot whether the effect is being applied, but it’s not designed to help you make decisions about your mix.
Multiband Saturator uses calibrated RMS metering with a 4 dB spectral tilt, including a balance line to help highlight if a particular band deviates from ideal balance. This means I can use Multiband Saturator’s metering to help me decide where to apply saturation.
Another huge benefit here is that Multiband Saturator works in Mid/Side, which makes it incredibly easy to see the phase correlation of each band as well. The narrow bars are the Mid channel, and the wider bars are the Side channel. If a Side channel exceeds its relative Mid channel, the phase correlation is negative, meaning it’s too wide and will likely result in cancellations when summed to mono. This means we can use Multiband Saturator to maximise width by applying drive or adjusting the gain of a particular waveshaper to change its position in the mix.
Mid/Side Processing
Applying saturation to Mid and Side channels separately is a fantastic way to achieve greater impact and intent out of individual sounds or a full mix. Roar has a Mid/Side mode, but this can’t be used with Multiband mode, where it becomes much more powerful. You could use Mid/Side encoding with Multiband mode, and I have a free little device for that, but it still lacks the control and metering to make it useful. There’s also no useful way to see the balance between Mid and Side for each band, or to adjust it separately.
With Multiband Saturator, we have individual Colour Controls and metering per waveshaper, for both Mid and Side, allowing us to manipulate the presentation of a particular sound within a full mix with ease.
Controlling Harmonics
Saturation doesn’t need to be an On or Off effect. If we can control the balance of harmonics and when they are applied, we can tailor the processing to the situation at hand.
Roar has some cool Shaper types, one of my favourites being Noise for glueing together a drum group. We also get a Bias parameter, which allows us to get some even-order harmonics from any selected Shaper, at the cost of sacrificing headroom. But to change the balance of harmonics, we ultimately need to switch between Shaper types, which, as I mentioned earlier, require different gain staging.
With Multiband Saturator, we have three ‘Colour Controls’ per waveshaper, meaning each band, Mid or Side. All of these controls are continuous, with no jumping between different shaper types.
These controls are Hysteresis, which controls the amount of even-order harmonics using a transformer-like model; Transient Focus, which uses transient detection to control how the saturation is applied, allowing you to smoothly blend between saturating or compressing the transients, or adding harmonic density to the sustain; and Tone Shaping, which applies a pre/post tilt filter in the centre of each band, allowing you to shift the harmonics to where they sound best.
Aliasing
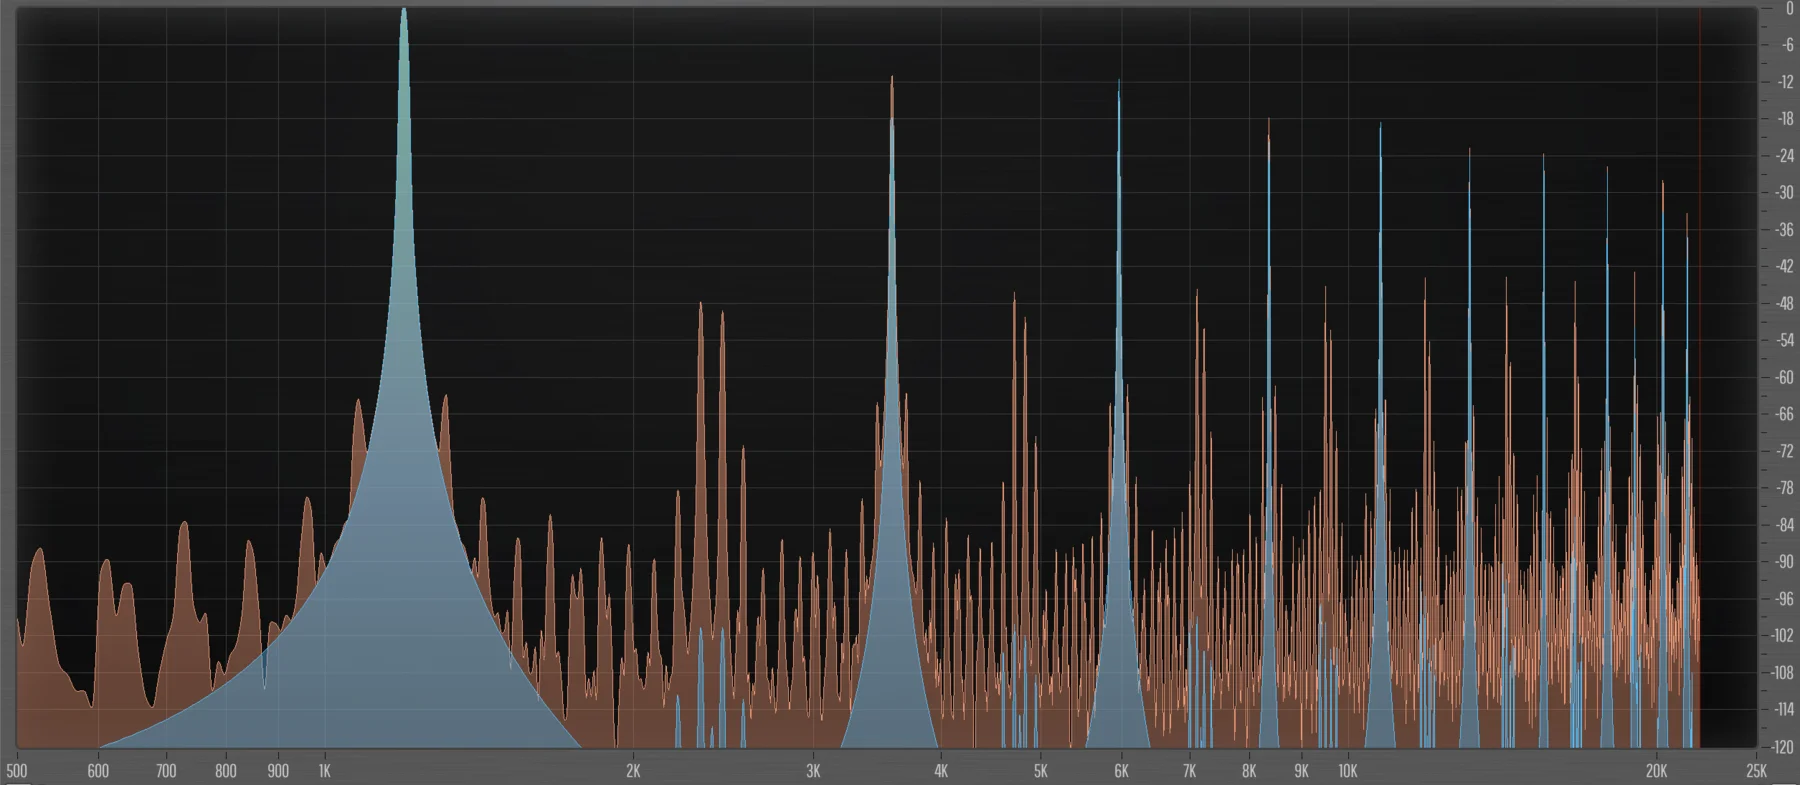
Aliasing happens in digital signal processing when harmonics are generated beyond the available bandwidth of the signal. These excess harmonics are folded back into the output and usually aren’t musically related to the input like harmonics are. Oversampling is a common approach to mitigate this, but it’s not the only method.
To test this, I set up Roar & Multiband Saturator as closely as possible. Roar actually had the advantage because Multiband Saturator produced a little more harmonics in this setup. I applied the same input signal and measured the results, paying close attention to the presence range, between 1–5 kHz, where our hearing is most sensitive.
Roar uses 4× minimum-phase oversampling, and its aliases in the presence range measured at about -60 dB. In this same range, Multiband Saturator’s aliases measured at around -100 dB, which is a big difference. It’s likely that any of this aliasing will end up buried in the noise floor of your final render.
Update 18/11/2026: I’ve since realised that the reason why Roar’s reading was so high was due to the non-oversampled hard clipper that Ableton uses to manage overshoots. If you turn the Output Gain down to avoid it you can get a much better reading but this makes the comparison much harder to calibrate and it still can’t beat Multiband Saturator. It also begs the question, how are you going to know how much you need to turn down the Output Gain to avoid it? The clip indicator next to this control is not exactly indicative of clipping, so even if you remember to adjust it, the only way to be sure its calibrated correctly is to see if there’s an excessive amount of aliasing. A strange decision in my opinion.
Keep in mind that Multiband Saturator only uses 5% more CPU than Roar with comparative settings. And if we add FabFilter Saturn 2 to the comparison, we see it produces less aliasing than Roar, but more than Multiband Saturator, while using significantly more CPU.
This is because Multiband Saturator uses 3× linear-phase oversampling with Antiderivative Antialiasing to achieve a fantastic compromise between antialiasing performance and CPU usage. Antialiasing is an area I’ve spent a lot of development time on, and I have some useful utilities for developers that I’ll be sharing soon.
Exploring Versus Shaping
The question isn’t which one is better or more useful, it’s in what situations each one excels.
Roar is fantastic for extracting new textures and timbres out of a signal. You could make use of the notches caused by running the device in parallel by modulating the crossovers with LFOs, apply filtering per band with modulation, and run all that through Roar’s built-in delay, for example. There’s a lot to explore and a high chance that you’ll find something unique that you enjoy, but it will probably need some further processing to fit nicely into your mix.
That’s where Multiband Saturator comes in. You can use it to further enhance the result, bring back some clarity and punch, while also maximising the width, then dial in just the right amount with the Mix parameter, and do all of that incredibly fast.
The simplest way to look at it is that Roar is great for exploring new sounds, while Multiband Saturator excels at shaping existing ones.
I’ll be doing a deeper walkthrough for Multiband Saturator in the future, but for now feel free to check out the User Guide.